
Temperature Scanner Replacement Project Part 1
The whole project can be viewed in this repository.
Some labmates of mine are in a tricky situation: for their research on melt electrospinning they use thermocouples to measure the temperature inside and around a molten pool of polymer within inches (10 cm) of a metal plate at -40,000 Volts (the melt and electro- parts of melt electrospinning, respectively). The problem is that sometimes, just sometimes, all those kilovolts dont stay 10 cm away, they find the thermocouple wires and zap all the way to the temperature scanner. The result is much less catastrophic than one would expect, but still permanent death for that channel of the temperature scanner. Luckily our scanner had 10 channels to start with!
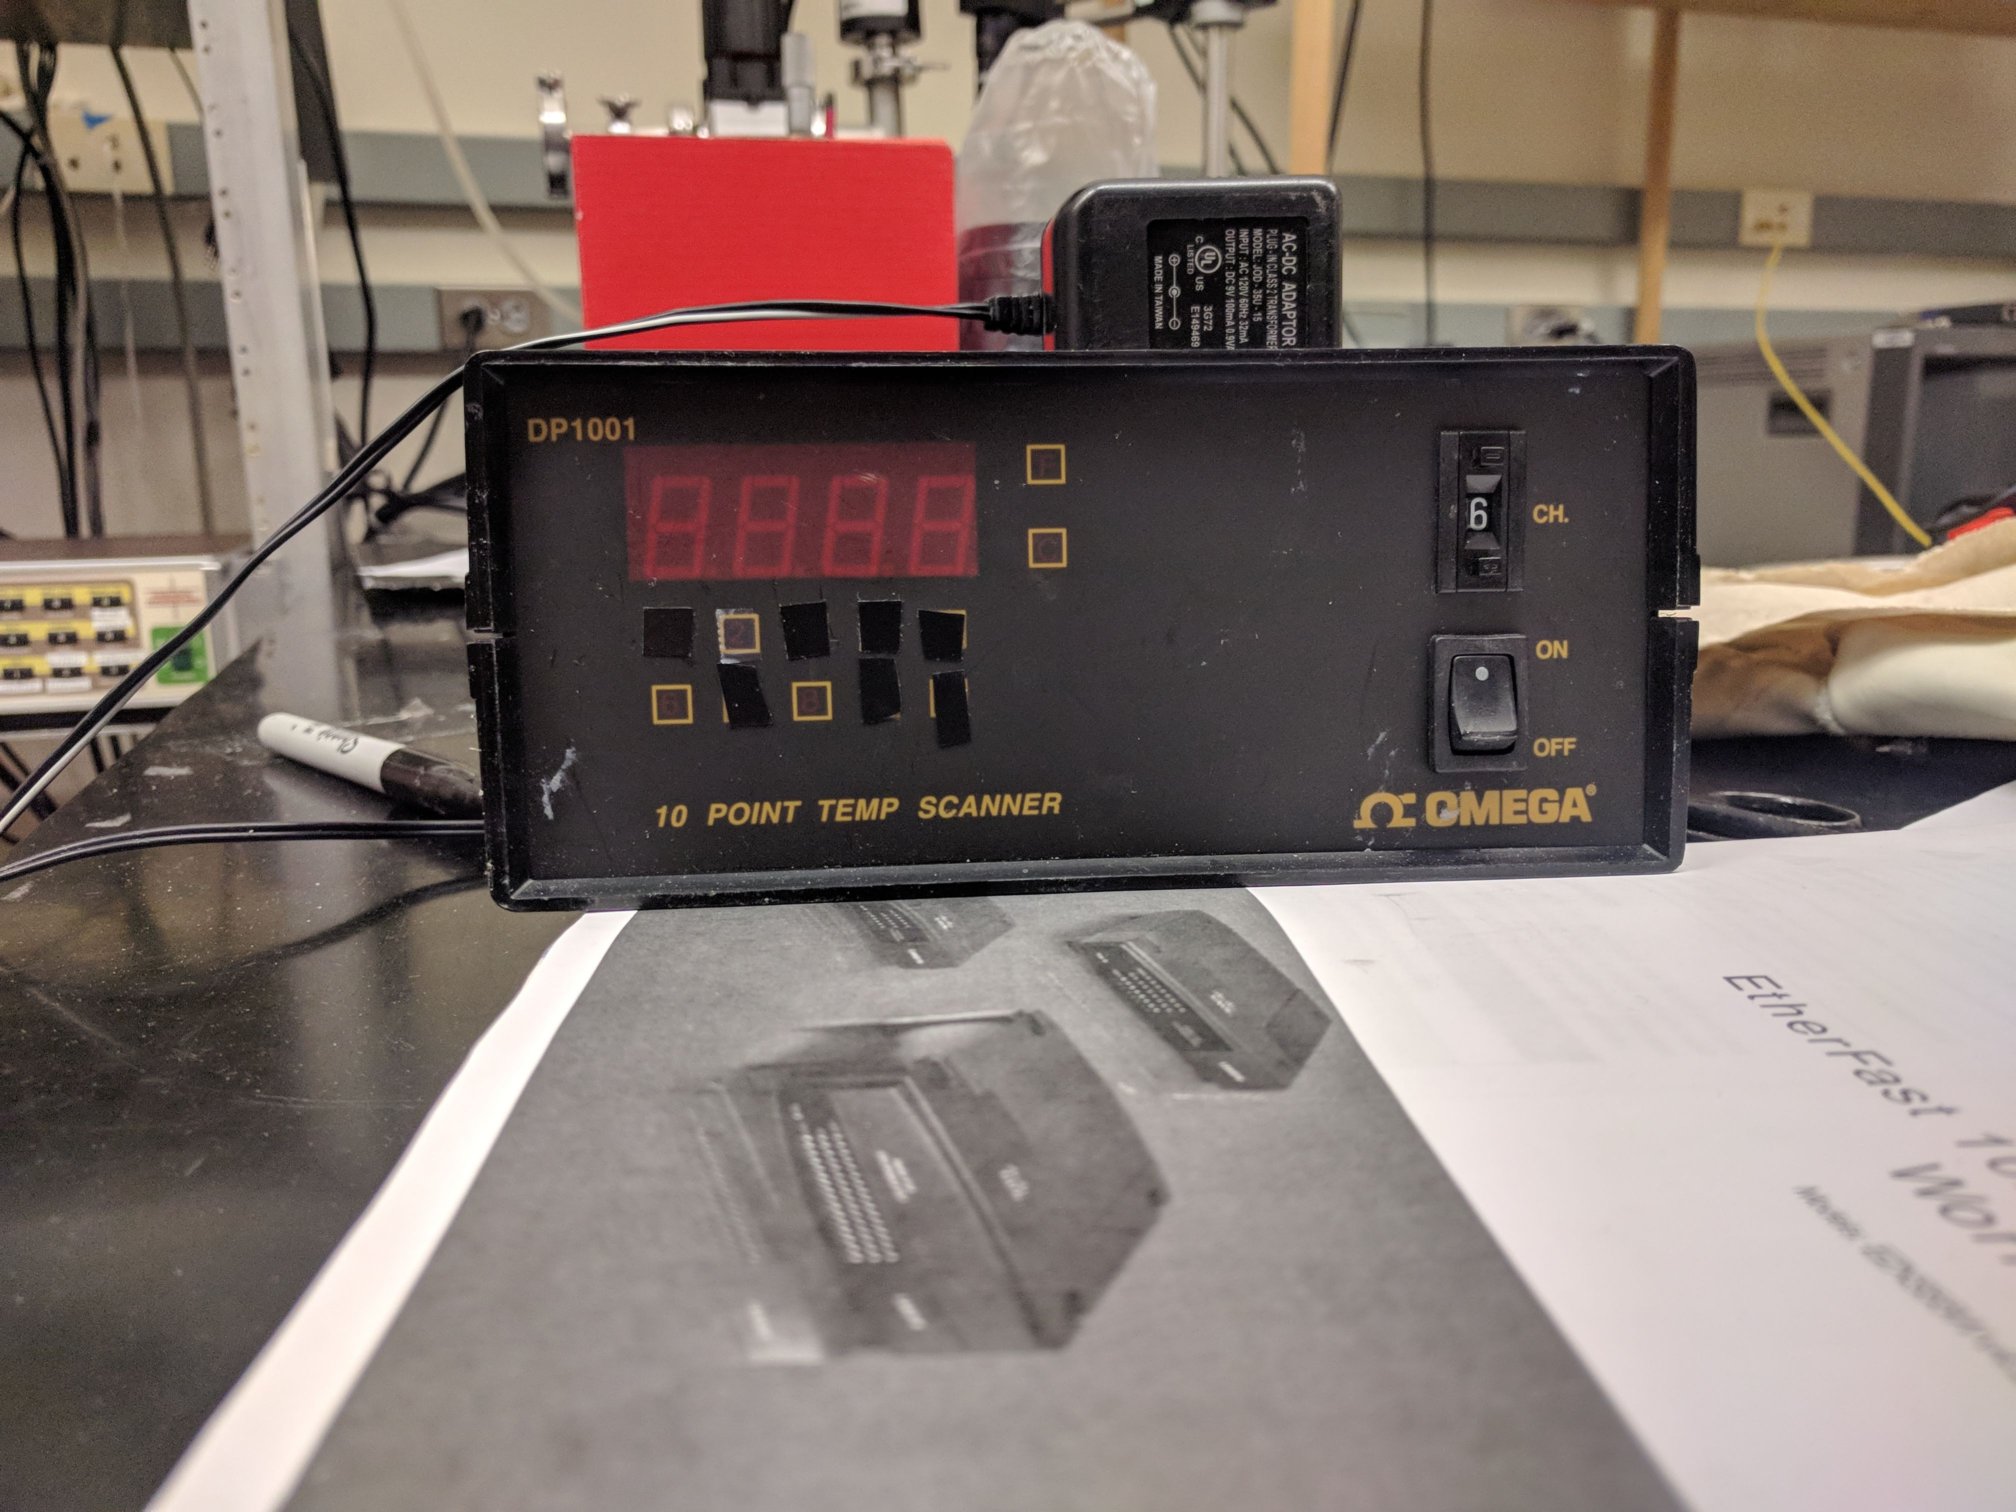
The old Omega temperature scanner with 3 channels left.
Once the scanner lost a couple channels, we started looking into repair/replacement. The price of a replacement with similar functionality (read up to 10 thermocouples and display the temperature) was over $300, and if we wanted to add any new features such as datalogging, the price climbs north of $500 fairly quickly. All that just to get us back to square one, without solving the problem of shocks to the system killing it. I had already been using a separate temperature monitoring setup using (Adafruit Feathers, FeatherWings and Max31850 breakouts)[swicano.github.io/images/T_breakout/Breadboard_TReader.jpg], so I suggested we could cobble together our own system that had all the features we wanted for a similar price out of those.
We made a list of the features the old scanner had and some new ones we’d like:
- Cheaper than a new Omega scanner
- Standalone operation, like old scanner
- 10 Thermocouple channels, like old scanner
- Display current temperature
- Datalogging to file (SD card), new
- Replaceable parts, new
- be 30 kV shock proof, new
That last one might be a bit hard to come by, so if that doesn’t work out, having replaceable channels or individual parts should still be a large improvement. That way if a channel gets fried, we can replace just that channel, instead of the whole scanner.
Parts Choice
The temperature sensor we decided on was the MAX31856 breakout at $17.50. The setup I previously used is MAX31850T based, which is cheap and uses 1-wire, but isnt available as a breakout board (only the K-type is), and requires extra processing to convert the output to the true temperature. The MAX31856 uses SPI, so we will need at least 10 spare GPIO pins for C/S (or a multiplexer), but is available as a breakout board, and can handle almost any kind of thermocouple without additional computation. We picked the off-the-shelf breakout board rather than fully custom solution intially, since it lets us quickly order replacements if we need them. If the shock proofing design works, we could design a breakout that includes both the temperature sensor and the shock proofing circuitry.
Having decided on a temperature sensor, we needed a microprocessor board capable of interfacing with 10 copies of it, and handling all the IO for the screen and logfiles.
We decided on using an Adalogger M0, since it is very affordable ($20) and has enough spare pins to measure all the temperatures without multiplexing. It already includes a microSD reader/writer for logging, and connections for both USB and battery power in case being plugged into the wall is deemed a risk.
As for the display, we picked the cheapest display FeatherWing, the $15 128x32 OLED FeatherWing, which is small but can still fit 4 lines of text, more than enough for our needs. In the future we can upgrade to any other display that can be run over I2C if we want a bigger screen, or touch functionality, etc, etc.

Preliminary Pin Usage Diagram
The total hardware cost for one each Adalogger and Oled, 10x Thermocouple breakouts, and SDcard/USB/other peripherals comes to under $250. So we’re ahead on cost so far, even without resorting to the rudeness that is buying knockoff Adafruit designs. Even better, we can buy only as many Temperature channels as we need, so the minimum viable product cost is under $60 with just one channel!
With all the technical requirements met, and my labmates tasked with writing the code as they see fit, my semi-official involvement ended at the “breadboards, rat’s nest, and breakouts” stage.
In future parts I’ll discuss my purely unofficial involvement thereafter where I design my first circuitboard to connect the breakouts to the Adalogger, create a 3D printed holder to hold this hardware, and finally (hopefully) solve the original problem of high voltage pulses killing our electronics.
Part 2: circuit board goes here
Part 3: 3D printed case goes here
Part 4: A shocking finale might go here
The whole project can be viewed in this repository.
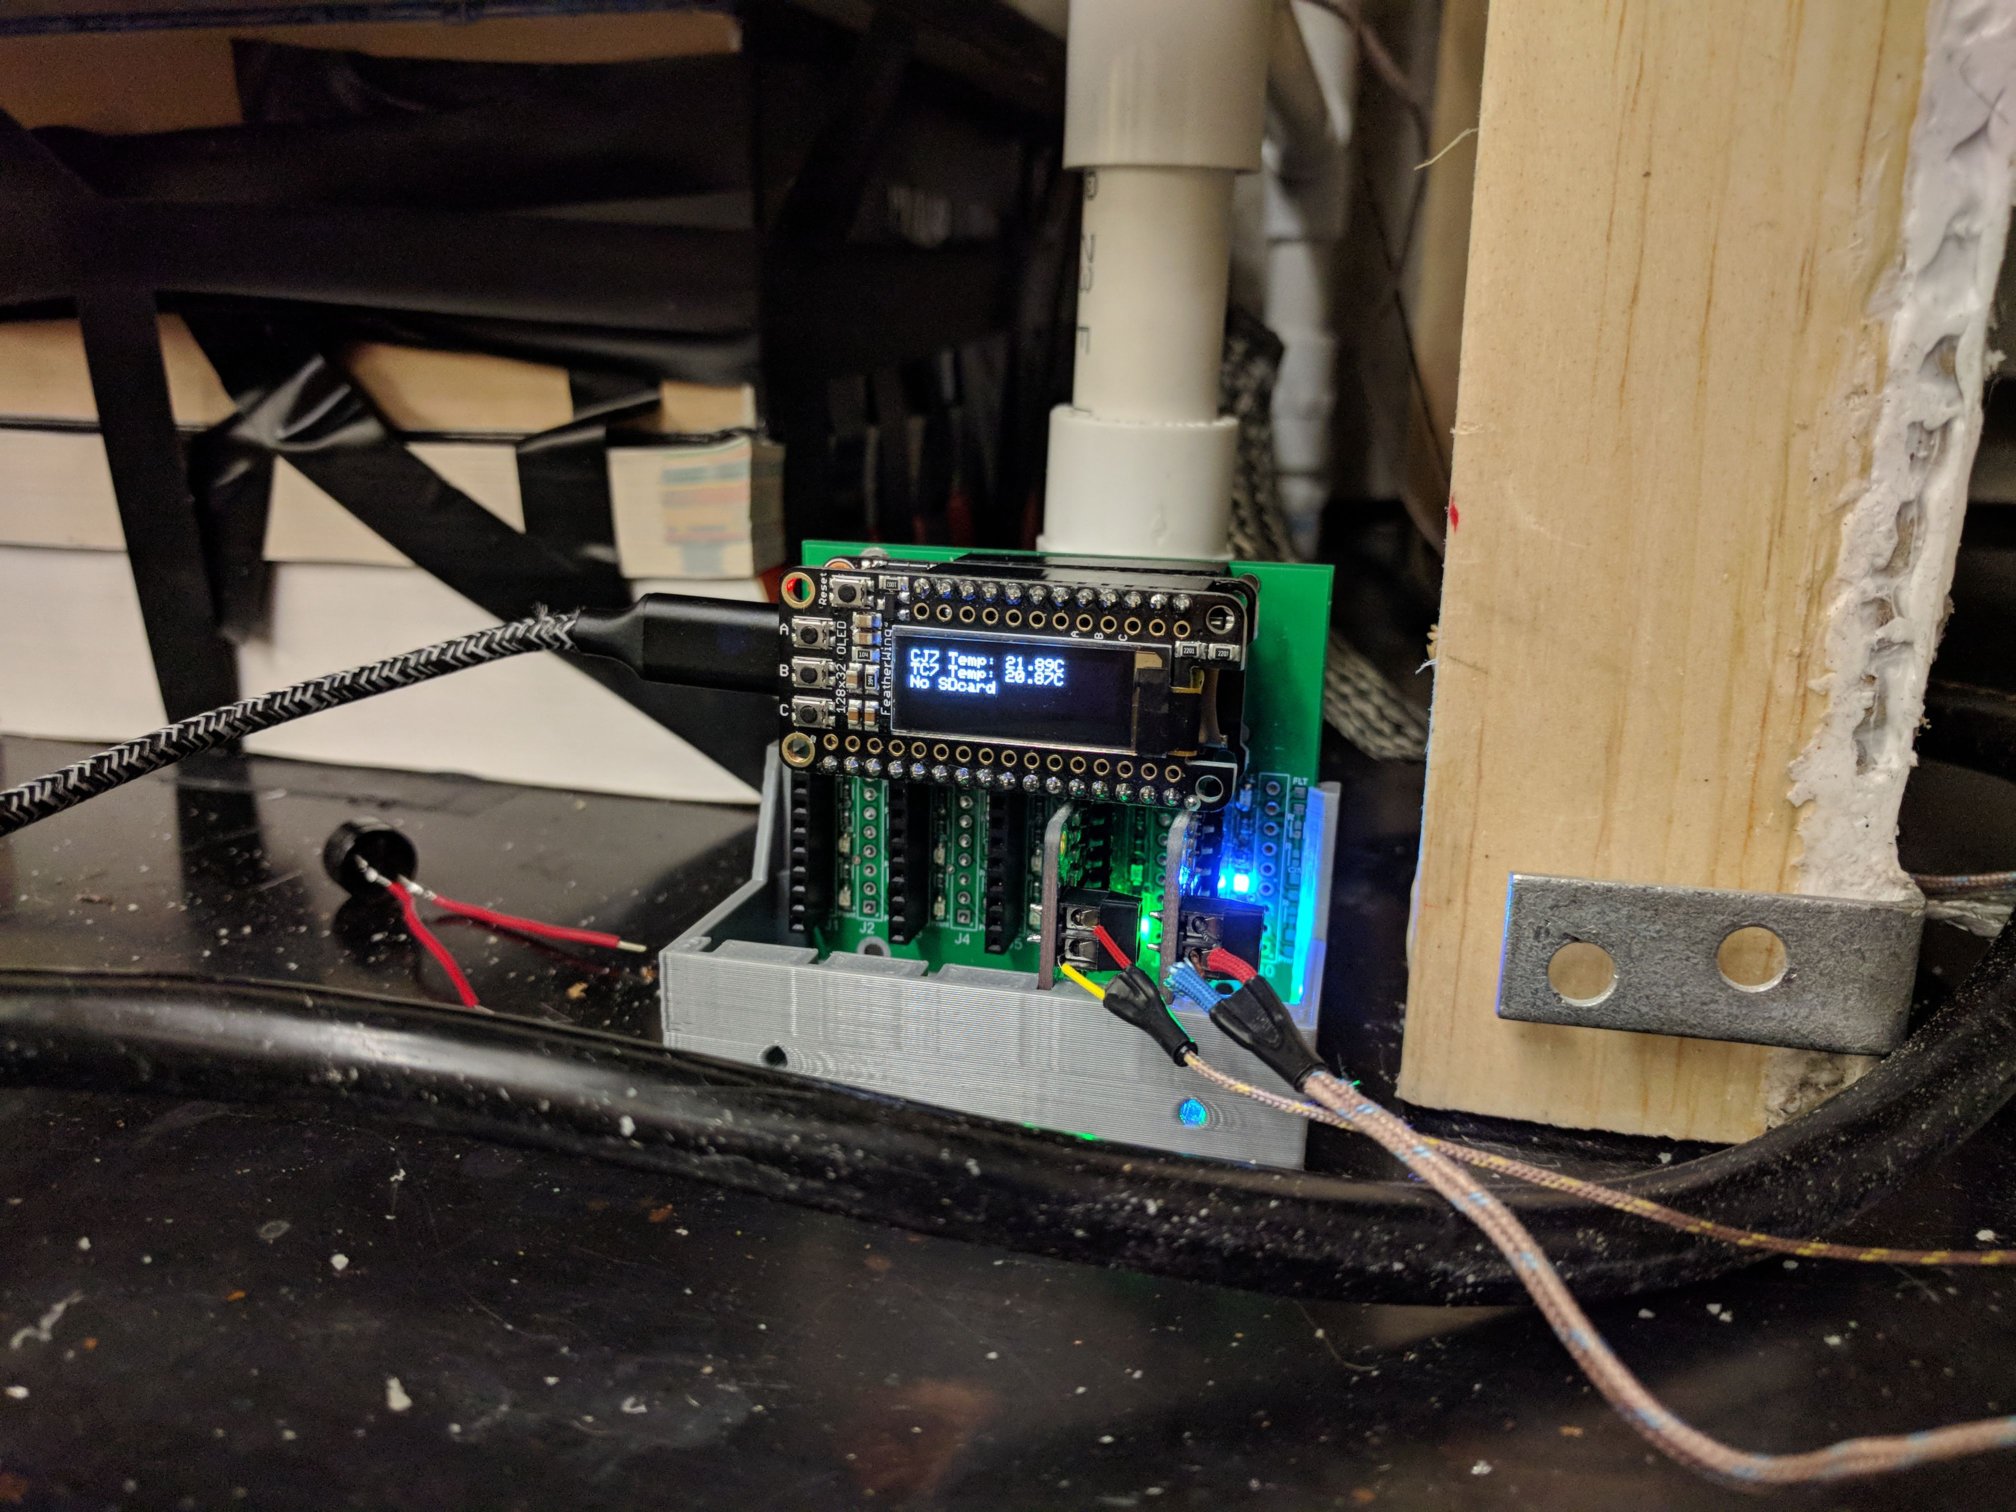
A Sneak Peek at the current state of the project